


Alistair

Ali
CONTINUE READING....

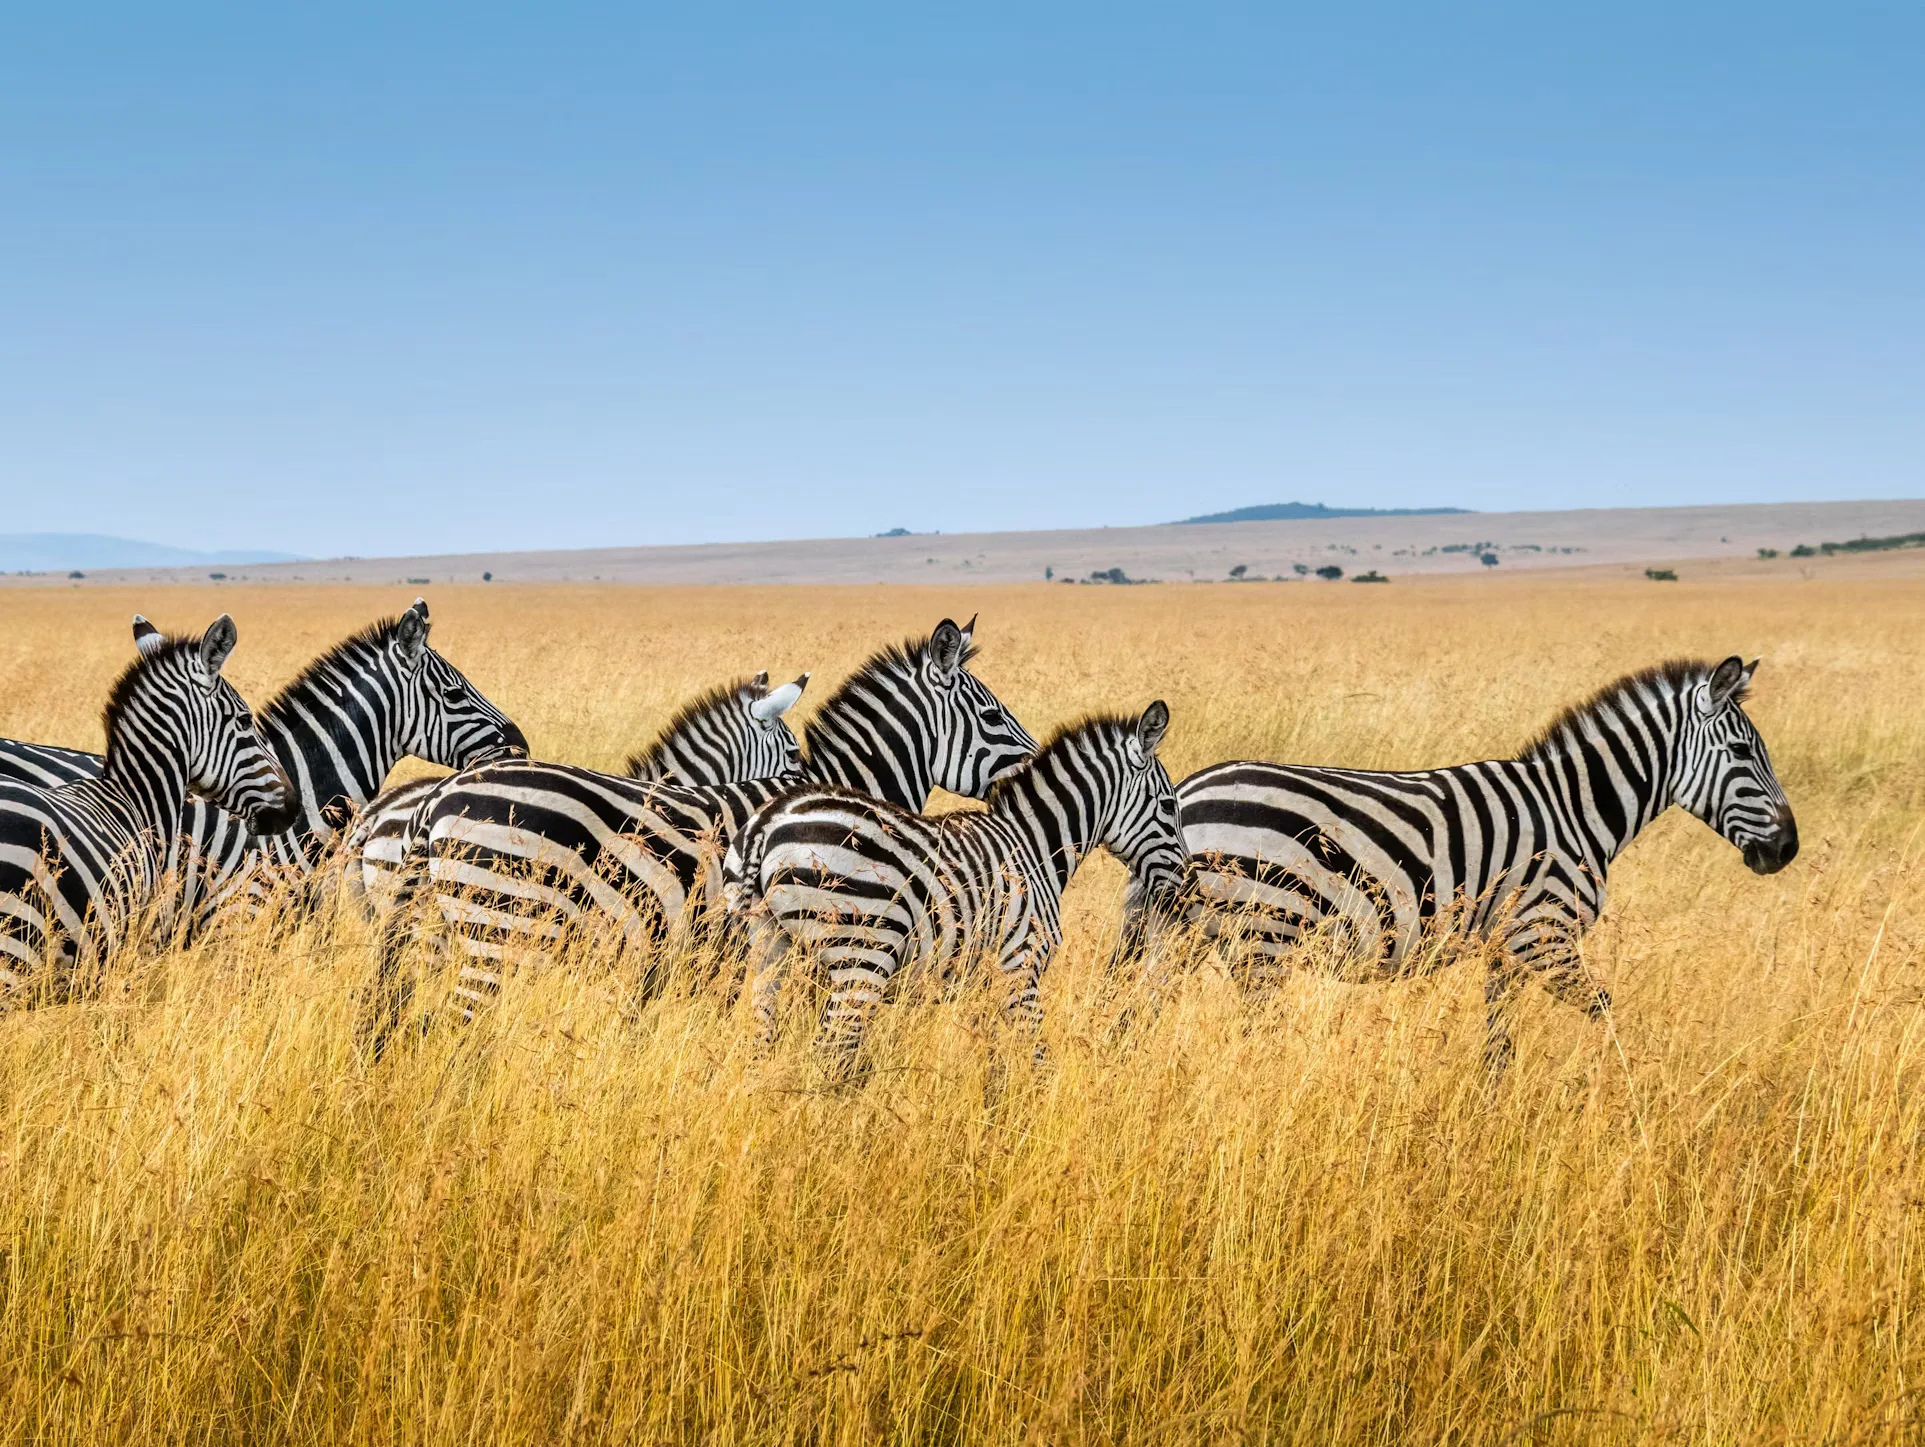
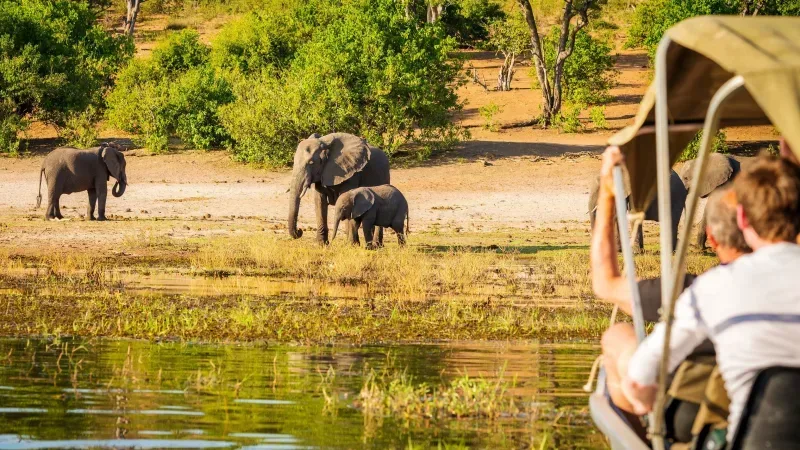
Whether you are on a Masai Mara safari in Kenya, in Serengeti in Tanzaniaor in the Okavango Delta in Botswana, many safari goers want to capture the 'perfect snap' to proudly show their friends at ome.
Our very own professional wildlife photographer, Alex shares some handy photography tips, skills and ideas to practice at home before going on your very own wildlife journey.
1) Tips for taking great photos
2) Camera settings
3) Photography on safari - wildlife, primates and culture
4) Great photography lodges and camps
5) Editing your images
6) Basic overview of the different types of camera
7) Basic overview of the different types of lenses
8) Photography ideas to try at home
Everyone likes to hear a well-written story and with photography it is no different, except the ability to communicate verbally is taken away meaning an audience needs to be engaged visually. Anyone can take a ‘snap’ of an animal or scene but if you can share an intimate moment into what was happening at the time in your image, it will make for a much more compelling and engaging photo, putting the audience there with you when you captured the image.
“The eyes are the window to the soul”. And this doubly important with wildlife photography. If you can capture the eyes of your subject, fantastic. Try to capture the moment when your subject looks directly at you, this will help forge a personal connection and help deepen interest in the photograph.
Each moment is different and if you can practise the patience to wait for your subject to either interact with another animal or something in the scene you’ll be on to a winning combination.
For me, this is probably the most important part of photography. All the other points matter as well and if you’re technically good but don’t know how to tell a story with your images, they might not be very interesting. This is where learning about your subject and how to react to situations is key. Practise all the tips and you’ll soon be well on your way to capturing great images either at home or on holiday.


The basic principle behind photography composition is the rule of thirds. It’s the way to organise and break an image down in to a more eye-pleasing way. Imagine the frame of your image being broken down in to nine parts with two horizontal and two vertical lines. By placing the important subjects within your image along these intersecting lines – you’ll be placing the emphasis on these parts over those that are not, drawing the viewer’s attention. The main theory behind this, is that the human mind is a complicated thing and our brain likes to have things compartmentalised in order to make more sense of them.
This isn’t something to be overwhelmed with – it’s not as complicated as you think. Before getting to grips with all the other technicalities, perhaps concentrate on improving your compositional skills first – from there you will have a solid base to begin working on the other aspects of photography.
Most cameras and smartphones have the option to put a ‘rule of thirds’ grid line either on the back screen and in the viewfinder, this is very helpful tool when learning how to compose your images.

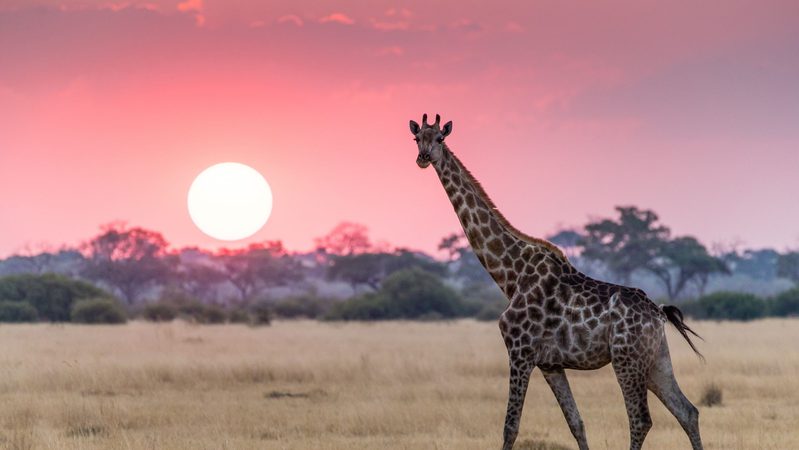
Lighting plays an integral role no matter what your subject is and the image you are wanting to create.
Generally, the best times for photography are during ‘golden hour’ which is when the sun is at its lowest in the sky, when its rising and setting. This often provides the most striking and flattering light for your subjects. This is why nature photographers (wildlife and landscape) are always out before the light is at its best so they can get be in position as the light gets to its optimum.
Shooting in bright daylight can also create great images, but care needs to be taken. Lovely contrasting images can be captured if the subject is either in bright light or under shade. Those in dappled light and shade can be tricky to get pleasing results.
Angles also come in to play here – remember to try positioning yourself in relation to the light and your subject. Put the light behind your subject to get nice back-lighting or at 90 degrees to get good side-lighting. All this will determine how and where shadows fall across your subject. It may sound like a lot to take in but the more you practise the more reading a scene will become second nature.
Another time of day which is great for photography is ‘Blue Hour’ which occurs just after the sunsets over the horizon with the residual light creating a soft blue effect. This time is especially good for capturing dramatic landscape shots.

Usually this will mean trying to get eye-level with your subject (where safe and possible). This will give a more intimate shot, whereas shooting down could make the image unflattering. This is something a lot of people, especially when starting out don’t consider – the angle at which you’re pointing your camera towards the subject.
With wildlife photography, it’s a good idea to not just try to get close ups of your subjects but to also frame them in their environment, this will convey a story to the viewer of where the subject is and their natural habitat.

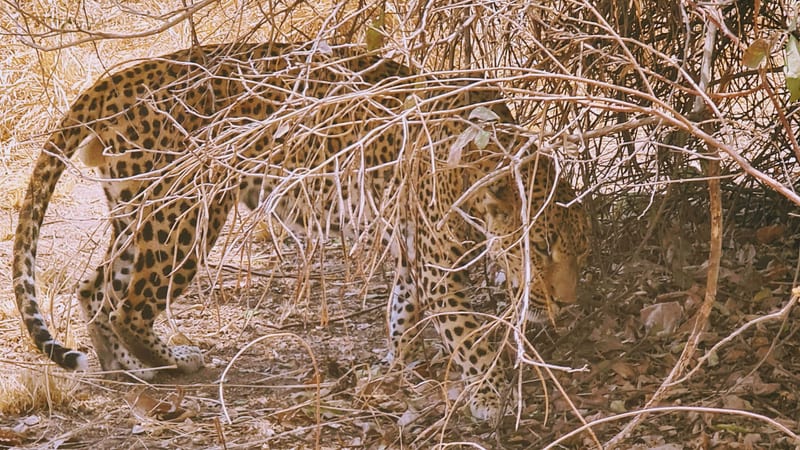
This in a way goes with the points mentioned above. Wait for the moment your subject does something interesting whether it’s stretching a wing, tilting a head or interacting with others. Sometimes waiting for the right moment might take a while but waiting for these moments will dramatically increase the quality of your photography. Say you are on safari and you come across a leopard asleep in a tree with only a slight angle to capture an image which. If you only spend a few minutes watching them and then decide to head elsewhere, you may miss some golden opportunities to get interesting shots.
Rather than just leaving a leopard asleep in a tree, we waited patiently for a herd of impala to walk past... and this was the result.

In order to purposefully capture good images, you should know your camera and equipment and how it works.
It’s misconstrued that you have to have the latest and greatest camera and lenses, but that’s not necessarily true, yes good equipment can certainly help to get higher quality images but if you don’t know how to use it you’ll lose more shots than you’ll capture.
Wildlife is often unpredictable and if you need to react quickly enough by changing settings or composition – if you don’t know how to do that it doesn’t matter if your camera costs £100 or £5000.
Watch tutorials, read the manual, practice – whatever you deem the most important functions of the camera to you, ideally, learn how to make those changes without taking your eye away from the viewfinder – meaning you can react rapidly to what’s happening around you.
This determines how much light the camera allows to reach the sensor by controlling the speed and duration at which the shutter opens and closes. Faster shutter speeds allows you to either freeze the action of your subject or blur the subject using a lower shutter speed. Depending on the style of image you’re going for generally a faster shutter speed is used for wildlife photography with slower speeds used for landscape photography where your subject isn’t as erratic.
With slower shutter speeds, images are more prone to blurring due to movement from the photographer, this can be avoided by using a tripod. But if a slower shutter speed is needed for wildlife photography, sometimes a beanbag or monopod is used.
Without complicating this, ISO is short for International Standards Organisation. And within a camera, this refers to the sensitivity of the sensor to light. Think of it as a digital version of the film that used to be put in cameras. The higher the ISO number the more sensitive it is to light but the drawback is that higher numbers produce less sharp images.
This is a combination of how much light both the camera and the lens allow to hit the camera’s sensor when the shutter button is pressed. Lenses with lower F Stop numbers such as 2.8 allows more light into the camera than a lens with, for example 6.5, so they can be used to capture better quality images in lower light conditions. They also help to create bokeh, which is the depth of field that you will see on images which in turn allows you to separate your subject from the rest of the image.
With landscape photography, depending on the subject being photographed, using a larger F Stop number creates a greater depth of field, meaning more areas of the image will be in focus.

Your safari guide will be doing the upmost to find all manner of interesting species whilst at the same time trying to get you in to the best positions to take photos and of course taking in to consideration not to distrupt the animals natural behaviour.
Variety is the spice of life… In some sightings and instances, you may have plenty of time to try different camera settings to get your exposure just right and to also try varying compositions. If you’re with an animal for a reasonable period of time, rather than taking the same image umpteen times, try different compositions, focal lengths and althernating between landscape and portrait orientations. This is a great way to start developing your own style!
Don’t just focus on the large, look for interesting patterns and features which will give you some great ideas for creative abstracts. Whilst it’s great to get close ups of the wildlife you encounter, it definitely makes for a thought provoking, story telling image if you put the species in it’s environment and the habitat it lives in.
Also, remember to put the camera down sometimes to fully appreciate where you are and the marvellous wildlife you’re experiencing, where it belongs, in it’s natural habitat and home.


This is quite a different ball game in comparison to photographing wildlife such as the Big Five in the Maasai Mara. While a lot of the principals involved with other aspects of wildlife photography will still apply, there’s a few key things to try to remember whilst you’re on your primate trekking adventure.
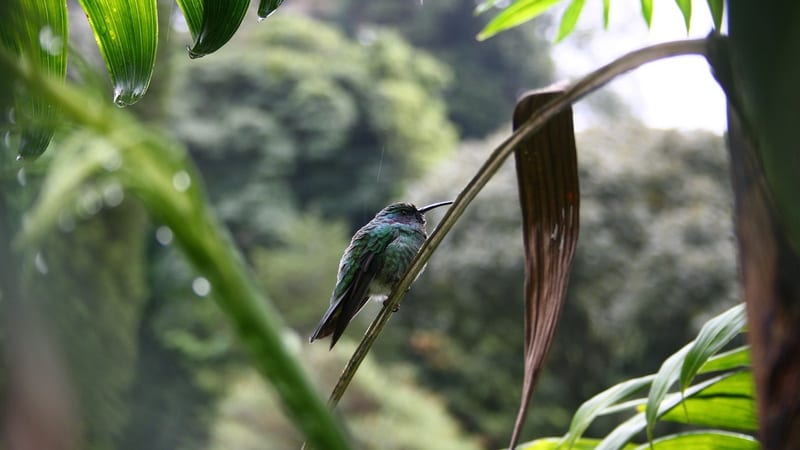
Usually when you encounter primates such as if you go gorilla trekking in Rwanda, they will be deep in the heart of a forest with dappled light and shadows. This can make photography challenging but can also give great opportunity for interesting compositions. Depth of field plays an important part whilst photographing primates in their natural environment. By using a shallow depth of field you'll be able to separate your subject from the surrounding foliage and capturing some intimate moments
Without delving too deep into camera settings and getting complicated – the main tip I’d like to share with you is composition. This will be dependent on the lens you are using and also the composition of the primates you encounter. Remember they are wild creatures and won’t be posing for you, so look to get a little creative with your framing. Look to use the natural environment around you; you could try shooting through vines, bamboo, tree branches and other foliage to create interesting perspectives.
Primates have a high DNA similarity to humans, so this opens some quite fascinating opportunities. As well as taking images of them as a whole, try to focus on different parts, such as the hands, feet and especially the eyes… after all, they are the window into the soul. And being such a close relative to us; it makes for a very interesting image if you can get a clear shot of the eyes. Also, try to look for traits and behaviours which almost mimic those of humans, these will give you great story-telling images.


Whilst on safari, the journey isn’t purely about the wildlife. You’ll no doubt come across vibrant and colourful characters on your travels. It may be your safari guide, a trip to a local market or through an urban or rural community. Take these opportunities to capture images of the interesting people that you come across but always try to ask their permission. This could make for more posed shots rather than relaxed everyday life images, so spend a little time and talk with them, when they get used to your presence (and the camera!), you’ll get more natural shots.
As with other types of photography its important to focus on what will draw your audience into the image – creating intrigue and sharing a story about the subject. Capturing a portrait isn’t just about getting a clear image of their face, it’s also about putting your subject in their environment.


There are a myriad of safari camps and lodges throughout Africa which offer specialist photography safaris and whilst I could talk for hours on this subject, here's a selection of some of my favourite places to travel in Africa which lend themselves to fantastic photography opportunities. There's a whole lot more out there but it's well-worth considering these if you're looking to go on a safari with a focus on improving your photography and are looking for somewhere that has great photographic potential and purpose built facilities.
Zimanga is a wildlife photographers dream. Excellent game viewing with purpose build safari vehicles and several water-level hides with reflection pools offer stunning wildlife viewing and photography potential. Set in the hearty of Kwa Zulu Natal, Zimanaga offers elegant and relaxed accommodation, perfect to unwind after spending a day in the bush searching for the Big Five. Zimanga also has a comfortable, state of the art overnight hide which is perfect for capturing images of wildlife as the come to drink.


Nestled on the banks of the mighty Zambezi River in the heart of Mana Pools National Park is Vundu and Little Vundu Camps. The main draw for photographers is the unique opportunity to photograph iconic species such as lions, elephant, hyena, leopards and African wild dog on foot. The camps hosted BBC teams, including the great Sir David Attenborough, as they filmed and photographed wildlife for numerous beautifully shot documentaries. These splendid safari camps are definitely an adventure but with comfort with walking safaris the high on the agenda.


A beautiful lodge nestled just outside of the Chobe National Park which is famously teeming with wildlife. This specialist photographic lodge has a tonne of creature comforts, a purpose built photography boat which cruises along the Chobe River system, allowing for some very special photography opportunities. Pangolin Chobe Hotel also has a dedicated studio to look through and edit your images and there's a team of resident wildlife photographic guides on hand to give you as much or as little assistance as you want.


Now you’ve captured some images, it’s time to start editing, letting your imagination and creativity to run wild, turning them in to what you envisaged when you took the photo.
There’s a vast array of different editing programs you can use depending on your experience level and what you are looking to achieve. Below are some of the of the more recognised platforms for editing your images on either a computer or on a smartphone.
Whether you’ve used them previously or picking them up for the first time; there’s huge amounts of online tutorials you can watch to pick all manner of useful hints, tips and instructions.
This is probably one of the most recognised pieces of photo-editing software and pretty much everyone will have heard of it. It’s quite a complicated but very powerful tool to use where you can edit and manipulate images until your heart is content.
The little sibling to Photoshop but still a very competent tool. It doesn’t have as many bells and whistles but that isn’t necessarily a bad thing, you can still edit and create some fantastic end results without getting too complicated and after Photoshop is probably still the most popular editing software amongst photographers. It also comes with a few presets (these are handy tools to quickly edit your images with various predetermined adjustments and filters.
A moderately new player on the photo-editing scene but one which is making some huge waves as a serious competitor to Adobe’s products. If you either love or hate editing images this could be a good alternative as it is a good hybrid of both Photoshop and Lightroom but without being overly complicated. It also comes with a bag full of useful presets which you can quickly apply to your photos without too much hassle.
There's a whole range of editing apps which you can download on to your mobile device. Here's a selection of the more popular options.
With well over 100 million photos and videos being posted each and every day to Instagram, they’d be foolish not to have their own library of filters and basic editing options. They have some great filters and presets which can help you quickly edit your photos before sharing them with your friends and family.
If you’re a little more serious about editing your images on your mobile then Snapseed is a great option for you, giving you very good control over fine tuning your images then a lot of other mobile options.
This App is a little different to everything else, it allows you to add fantastic filters to your images rather than editing the entire image (as with Instagram and Snapseed). You can extremely creative with this app, making images much more arty and created on a camera with more advanced editing software.

This is the best App for turning your mobile images black and white. Add all manner of effects and filters to your images to create stunning monochrome images and let your creative side run wild. It’s simple to use and you’ll have a lot of fun with it.
Buying a suitable camera can be a big decision and also investment. There’s a myriad of choices out there from DSLR, Mirrorless, Bridge cameras and so on. Do some research and find out which type of camera will be most useful to you. Don’t be afraid to go into a camera shop and speak with an expert. They’ll be able to give you loads of great advice, and you’ll be able to see how the different cameras feel in your hands. Here’s a brief explanation into some of the different formats of camera.
For many, many years this has been the top choice by professional and amateur photographers alike with options available for a huge range of budgets. DSLR stands for Digital Single Reflex Lens and refers the mirror which sits in from of the camera sensor and control the amount of light on to the camera sensor when the shutter button is pressed. These types of cameras require different lenses in different situations so they are interchangeable.
This is the new kid on the block and is quickly establishing itself in the market. As it says on the tin, the main difference between a DSLR and Mirrorless is the lack of a mirror controlling the amount of light on to the camera sensor. In Mirrorless cameras, the light passes directly on the sensor at all times – the removal of the mirror makes these cameras much smaller and lighter than their DSLR cousins. They also use electronic viewfinders (EVF) rather than an optical which are used in a DSLR camera.
Unlike DSLR and Mirrorless cameras, which have interchangeable lenses a bridge camera has one lens which is permanently fixed to the body. Most have the same functionality and ability to control how you capture an image as you would with a DSLR or Mirrorless but without having to spend more money on a myriad of lenses. The zoom range on bridge cameras can be quite extraordinary but this doesn’t mean the quality is better.


The cost of all these options depends on the amount of technology packed into each model. Whether it’s Canon, Nikon, Sony don’t worry about which brand to go for too much at this stage, yes some makes are better than others at certain things but all are good in their own right.
One of the best ways to determine which you might want to purchase is to consider your budget, what you are going to be mainly using the camera for (and how often) then go to your local camera shop and speak with one of the helpful experts, they’ll talk to you about all manner of options, you’ll be able to hold and the test the cameras for yourself before buying – this is actually quite important as cameras have different ergonomics meaning some will fit in your hands better than others.
There’s a huge array of lenses out there so to keep this as simple as possible and a good piece of advice to follow is; Invest in the best ‘glass’ you can; this can make or break any images you try to capture. The quality of lens affects the quality of your images more than your camera as it lets the light in. Taking appropriate lenses on your travels will play a key part in the results you’ll get.
Lenses are grouped into different categories and what they are generally used for. The cost will be hugely variable depending on the specifications of the lens.

These lenses are generally used more for landscape photography but more and more wildlife photographers are using them depending on the location and species they’re capturing image of.
This is the multitool of the lens family. It’s great for capturing portraits, landscapes, group photos and even wildlife and nature depending on what you are shooting and the image you’re trying achieve.
Telephoto (and super-telephoto) – Zoom range goes anywhere up to 200mm all the way up to 600mm +
These are the lenses that bring the subject closest to you and are the preferred tools for sports, wildlife and even portrait photographers. They’re used to really isolate subjects and get you closer to the action without disturbing your subject and are ideal for taking on safari.
Prime lenses
The main difference between these and other lenses is that they don’t have the ability to zoom or change focal length, meaning you will need to do that by either moving towards or away from your subjects and will often produce much sharper images.
Macro
These are mainly used for capturing images of very small subjects such as insects or very fine, close up details. Think of them as the magnifying glass of the lens family.
Lens attachments for your phone
For those that just simply wish to take their phone with them on safari, there are options for you to buy much smaller, lighter lenses which fit right on to your phone. These vary in price and functionality but there are some great options for wide angle, macro and telephoto attachments out there.
So many of us are guilty of taking photos, looking at them a couple of times and then forgetting about them on our phones, mobile devices or computers.
There are some fantastic options out there where you can upload your images to websites and design your own high-quality photo books.
The printing sites will often have different templates to give you lots of freedom to design and produce your very own beautifully crafted books to share and have a handy memory filled with your favourite images.
Here are a couple of great options for you.

Tonnes of templates and very easy to follow instructions, Blurb helps you create beautiful professional-quality photo-books. It also connects directly into Adobe's Photoshop and Lightroom making it a very easy experience.

As well as crafting eautiful photo-books, Snapfish also helps you turn your photos in to much more, home decor, mugs, cards and calendars - meaning you can create personalised gifts for everyone.
Pretty much everyone has access to a camera of some description or another these days, whether it’s a DSLR, Mirrorless or the one you carry around in your pocket every day. And with camera phones these days, it’s made practising and taking images all the more accessible. We’ve compiled a few ideas for you to try at home using just the basics without having to use fancy equipment.
Number one on our list is probably the most difficult. This home based photography challenge will test your creativity to the maximum using everyday objects around the house. Work on your compositional skills, your creative flair to make the mundane in your home look interesting to the eye. (find examples)


This one is a little silly but you can get very creative. You’ll need miniature figures or even Lego people and a creative mind for what you can create a landscape out of from food! Perhaps have them climbing an Everest of mashed potato or swimming through a bowl of Cheerios?


Another one to get your creative juices flowing. Shooting images in black and white is a different thought process to taking them in colour. With colour it can be obvious what your focus is on, but with black and white you need to think about what you’re trying to emphasise by using textures and shadows.


This is a great way to work on your compositional skills as well as improving how to master depth of field by using shallower depths of field to draw in the attention of the viewers eye to your subject.


Great practise for when you’re out on safari. You’ll soon get to grips with shutter speeds, depths of field, composition and capturing good moments in wildlife, such as birds taking off from a feeder or any creepy crawlies you find in the garden.


Now that we’ve given you a little insight into the world of photography and cameras, its time to get out there and start practising whether it’s in your home or garden. There’s a whole world to explore, in your neighbourhood, town, local nature reserves and of course destinations far and wild. Don’t be afraid to try things out, all the best photographers started from scratch and in no time you’ll be capturing fantastic images of your own.
And if you’re keen to go on a photography orientated safari whether it’s with friends, family safari or a group trip, we’ve have stunning itineraries to take you to phenomenal places, exposing you to brilliant wildlife and nature. After all, one of my favourite sayings is; photography is a journey and it can take you to wondrous places.
Call us today on 0203 111 1315 or enquire here to arrange your dream safari holiday or check out our ultimate safari guide.